Increasing XWiki attachment size limit
File limit size
In the default installation of XWiki, there's a limit to how large uploaded attachments can be.
This is not obvious at first, as the wiki will still accept the upload initially but, soon after the upload reaches 100%, it will fail in an error.
The site will not show you the error message, nor will logs record the error either. But the upload will have failed and the attachment will not be there, upon refreshing the page.
This article will show you how to avoid this issue.
Steps
The following are the steps you must take to change the limit.
Decide on a sensible limit for your needs
Start off by deciding the actual upper limit to how large you expect attachments to be for your XWiki articles, so that you won't get the same error in the future.
A good estimate should be around 1GB, maybe more if you plan on uploading large video files as attachments. Personally, I've decided to settle on 2.5GB, as I do plan on uploading video files.
If you only plan on attaching images and sound files, you may consider an even lower limit, such as 50MB or so.
Reconfigure nginx to allow for the specific limit that you've decided on
Nginx has a default file upload limit of 1MB. Exceeding this will give you errors.
In order to accept larger uploads, you must first tweak the "client_max_body_size" parameter in the configuration. Please visit this page for details on how to achieve this.
Change the XWiki upload size limit parameter
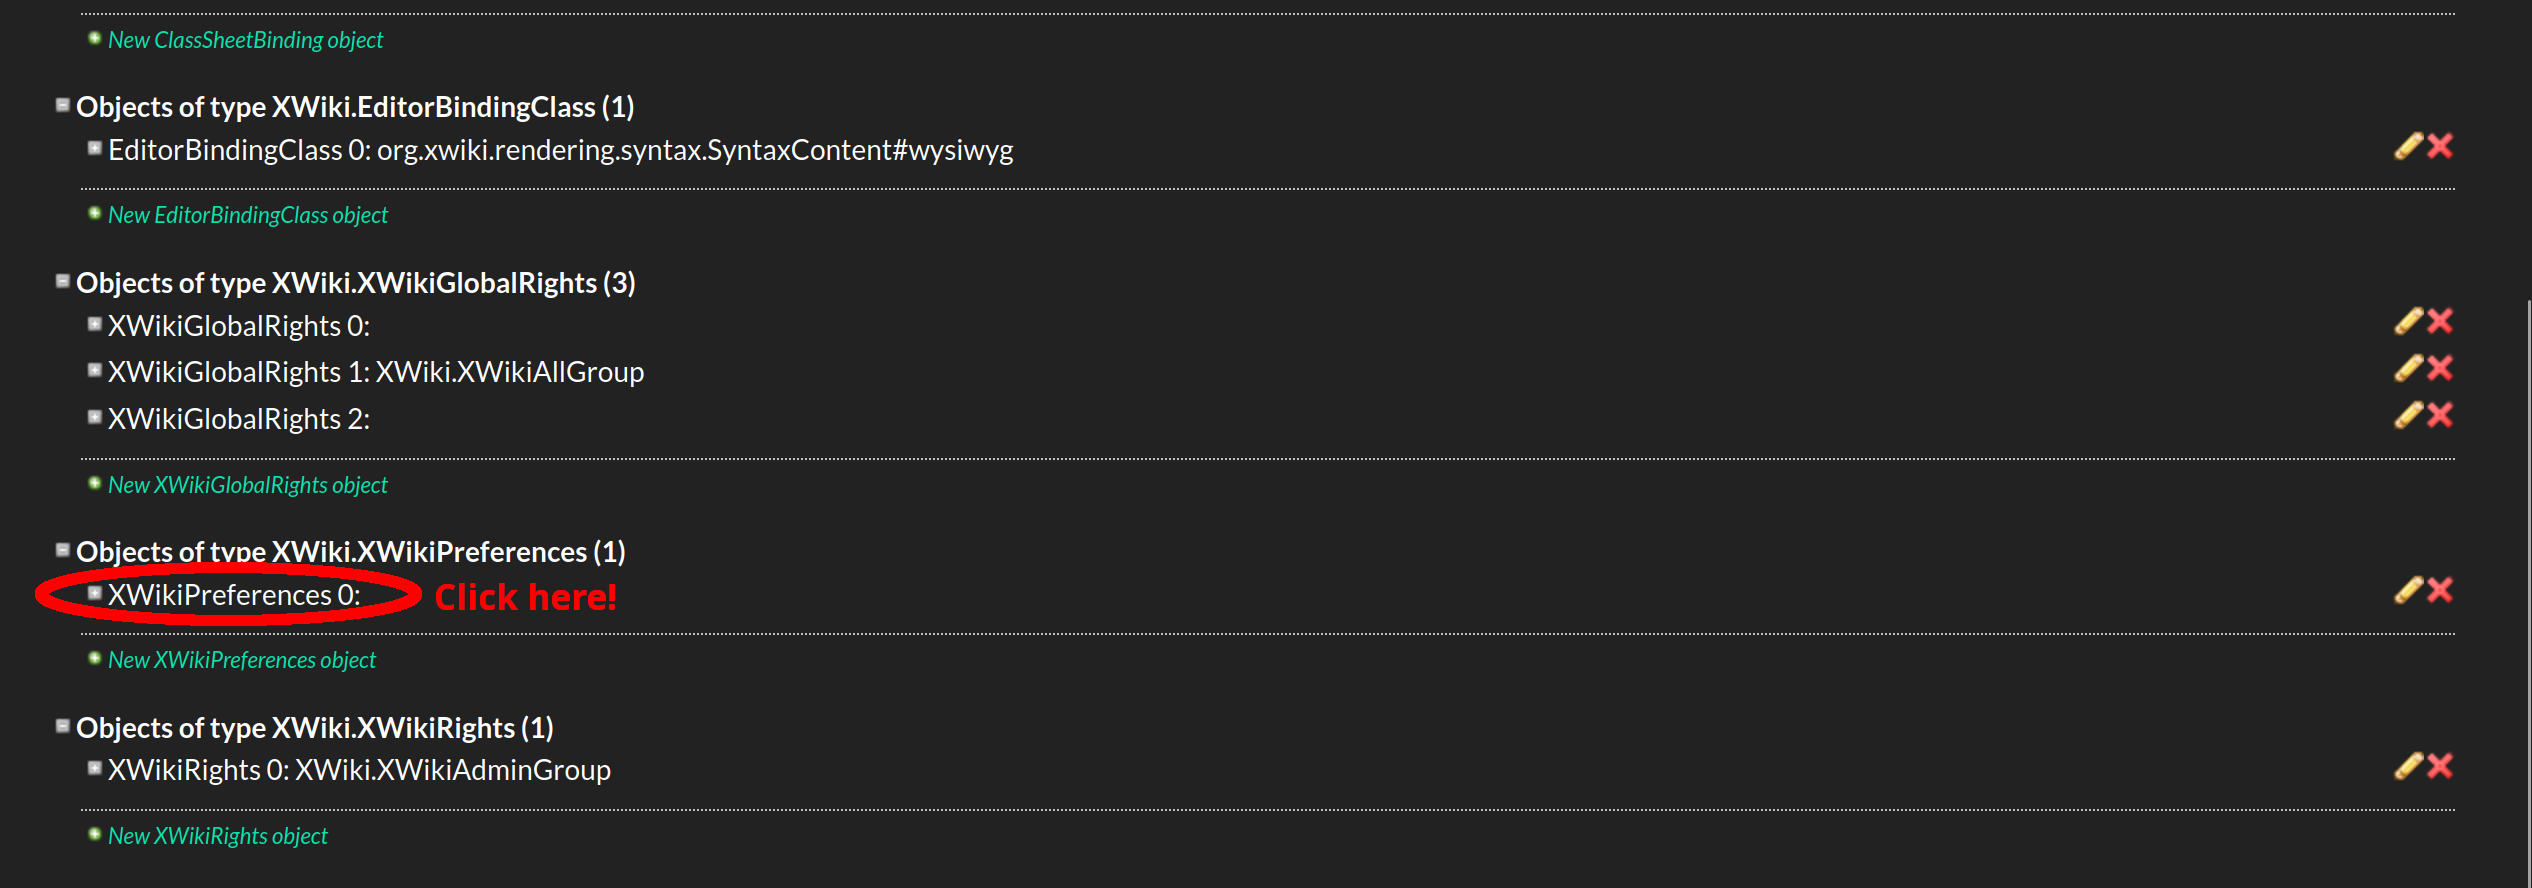
XWiki has a specific section for changing parameters. This section can be found here. When editing this page, please be very careful not to tweak parameters which are mission critical!
On this page, you should find a section called "XWikiPreferences 0", right under "Objects of type XWiki.XWikiPreferences (1)". These sections can be expanded by clicking on them, much like a collapsable tree structure. Expand the "XWikiPreferences 0" node by left clicking on it!
Scroll down to "Maximum Upload Size" and enter a proper setting in that box! It's a text box that is initially empty, but can be set to contain natural numbers.
The number in this box will represent the limit for how large any future attachment can be (in bytes). Set this to whatever you decided you want the upper limit to be at!
Note that this value can be changed at any point in time, so even if you pick a number and it soon becomes apparent that the limit is still too low, you can tweak it at a latter time again!
In the screenshot below, I set it to 4 GB.
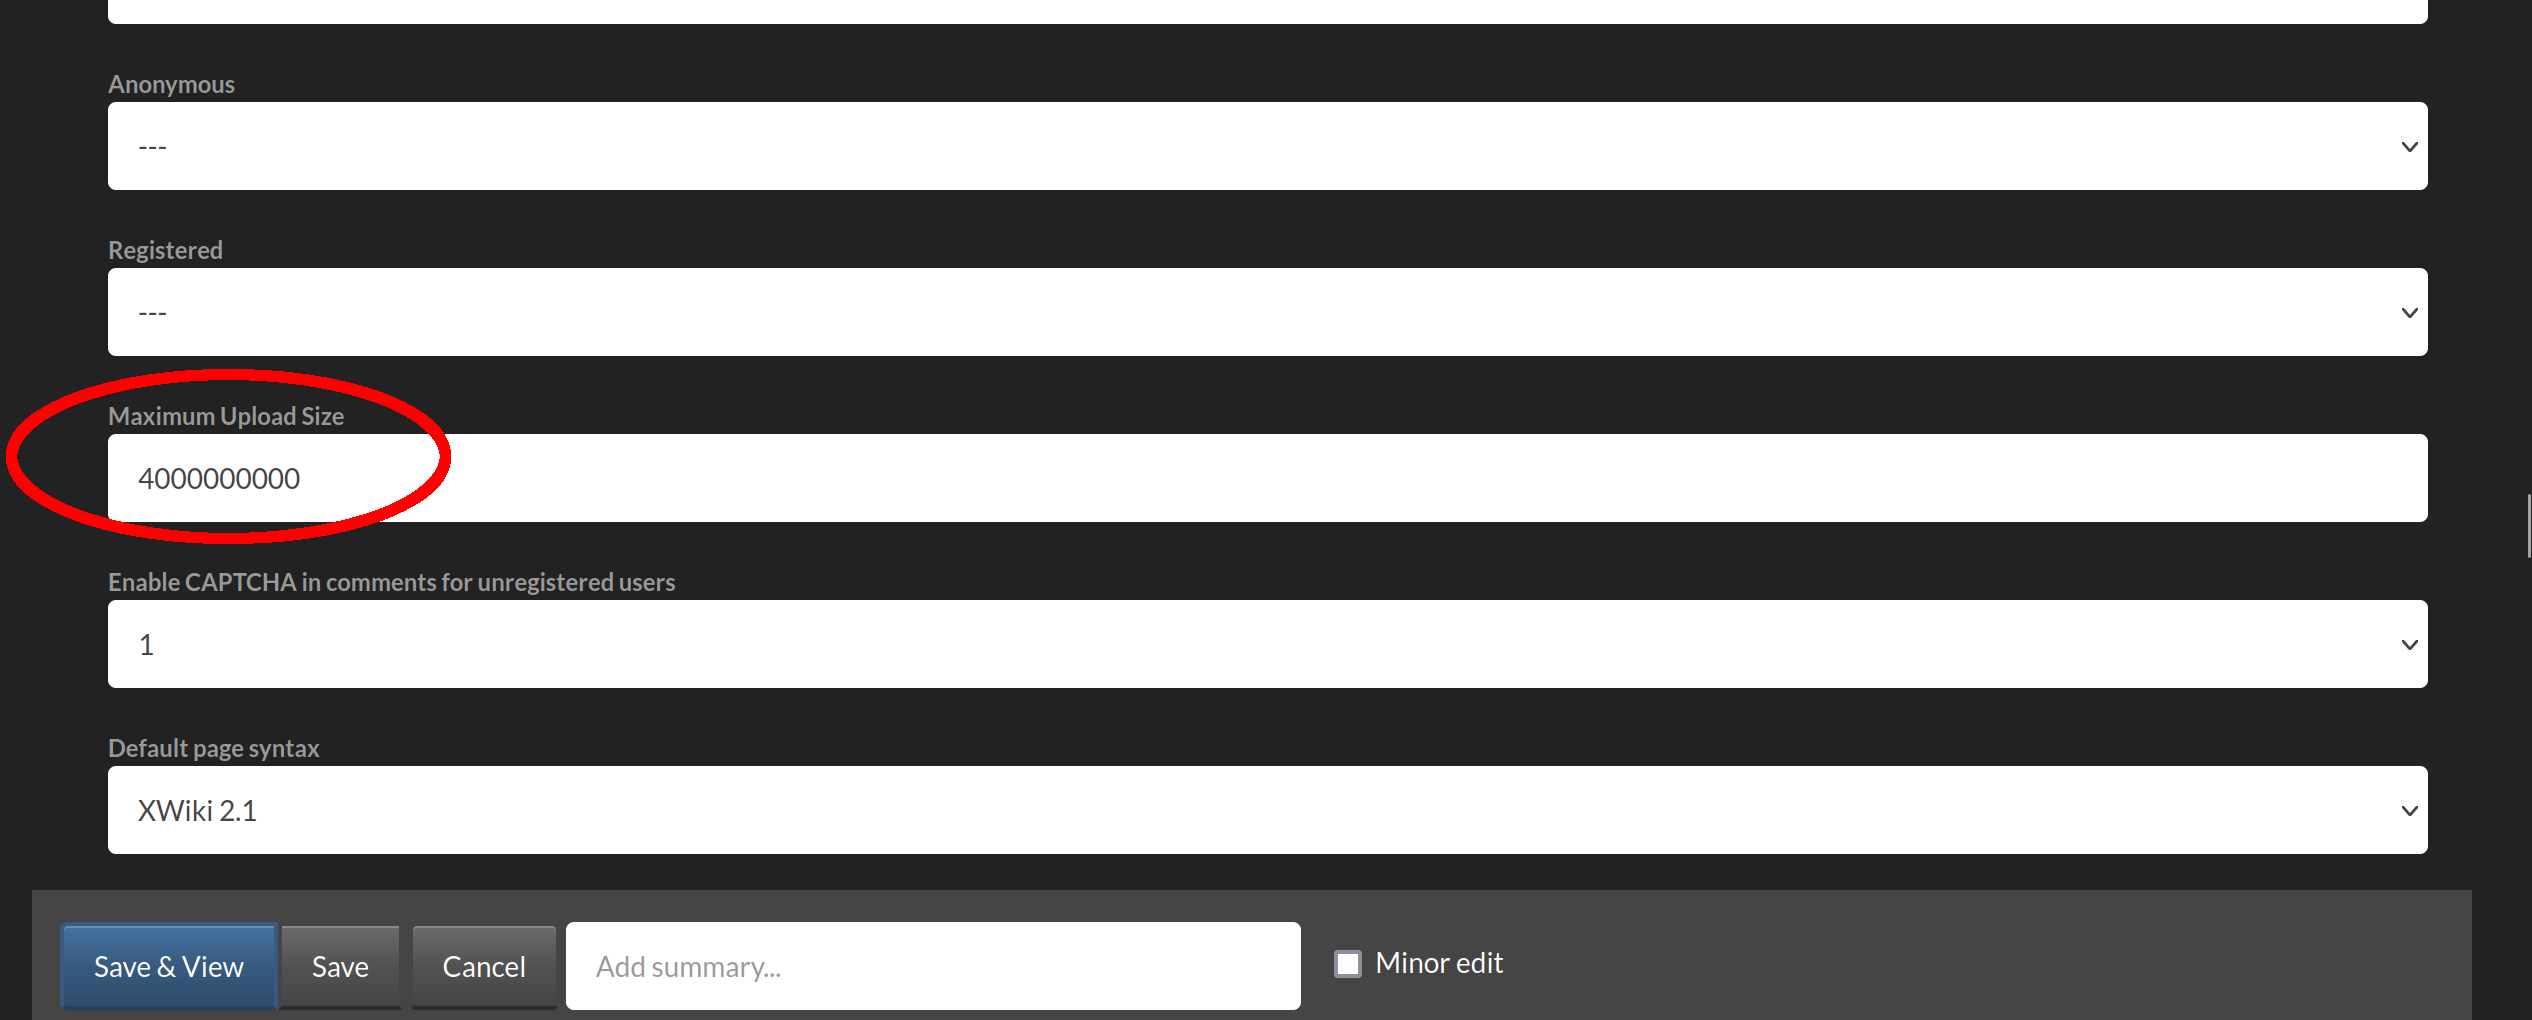
Please don't forget to click the "Save" or "Save & View" buttons at the end, otherwise your change will not be saved!
I said at the beginning that I plan for my limit to be 2.5GB but here I set it to 4GB. Ultimately, it doesn't matter which it is, as long as there's a sensible limit set. Set it to whatever you feel comfortable for you.
Footnote
That's it! You're done!
Please note that you might still get an upload error when attaching large files in the future, but, this time, once you'll refresh the page, the file should be in the "Attachments" section of the page, this time, and you should be able to use it. The error is merely aesthetic, and will have no actual effects whatsoever.
Happy coding!